Looking for techniques? The beginner techniques are layering, washes, wet blending, thin coats, edge highlighting and dry brushing. Jump to the technique list, each one with the episode where she tried it.
 1:45Watch where she startedEpisode 01 · I Accidentally Spent $2,368 on Warhammer Before Learning to PaintEpisode 01: everything she bought before she had painted a single miniature.Watch on YouTube →
01What do I need to start painting miniatures?
Less than she bought. Three weeks after first walking into a Warhammer store she had a pile of boxes — the $2,368 in the Episode 01 title — and still hadn't painted a single mini. The guy at the store recommended something, so she bought it — and the plan to buy "one or two things" didn't survive the trip.
“I told myself I'm just going to buy one or two things. Well, that didn't happen.” — Episode 01
What her first episodes actually use to get one miniature finished:
- One miniature to start on (see the next step about which one)
- Glue to assemble it
- Primer — she primes grey, and tried zenithal priming on her first model
- Paints in a few shades of each colour, so you can mix dark-to-light
- A wash (shade) to set the shadows
- Brushes — everything after the primer on her first two miniatures is brush work; the airbrush challenge came later

02Which miniature should I paint first?
Something simpler than she picked. For her first-ever miniature she chose the Biologus Putrifier — "I could have started with something simple, but instead I chose this." Her second, a Golden Demon copy attempt, was just as busy: pipes, fangs, teeth, bone, three weapons, something on its back and something on its head, each needing several steps.
“Unfortunately, just like the last miniature I painted, this dude had so many details. Why do I keep doing this to myself?” — Episode 03
The lesson from her first two: every extra detail is extra painting time. A model with fewer bits lets you practise the steps below without spending days on it.
Watch Episode 02 →03How do I put a miniature together?
Out of the box, a miniature is a frame of loose plastic parts — "something that definitely did not look like a miniature." She did what everyone told her to do: glue all the pieces together first, then paint. On her second miniature she noted one exception up front: "I had to put a head in first."
“I did what everybody advised me to do. I glued all the pieces together. Somehow it started to look like an actual miniature.” — Episode 02

04How do I prime a miniature?
Prime before any paint goes on. On her Golden Demon copy she primed grey — the same as the professional painter she was learning from — and went straight into painting from there.
“I primed the miniature gray, which is what Richard did, too. And then I got straight into painting.” — Episode 03
Try zenithal priming early. Zenithal means dark from below, light from directly above, so the model already shows rough shadows and highlights before you mix a single colour. She practised it on her very first miniature.
“Then I practiced my zenithal, which I actually found pretty cool.” — Episode 02

05What order do you paint a miniature in?
Her real order, once she'd learned it: prime → base colours dark-to-light → wash → final highlights and edges.
On her first miniature she painted the whole thing one green, then tried to layer brighter and brighter shades on top. For her second she followed Richard Gray's approach instead: mix a run of four shades from the start and place them by where the light falls — darkest in the shadows, working up through the mixes to the brightest where light would hit.
“Richard said to start by mixing four colors from the beginning and establish the light and shadows instead of just painting the whole thing in one color and then worrying about the shadows later. So that's exactly what I did.” — Episode 03
Expect it to look patchy at first. She started doubting whether she'd understood the method at all — until the colours were all on the model and the shapes and armour started to come together.

06Why do I need to thin my paint?
Thick paint straight from the pot hides detail and dries patchy. She lists thinning alongside highlights, shadows, edge highlighting and blending as the core skills she was learning by her second miniature.
“I'm already learning the highlights, the shadows, the edge highlighting, the blending, and how to thin my paint properly.” — Episode 03
By Episode 05 she was using thin paint on purpose: the Poxwalkers' skin went on with the paint kept really thin, so some of what was underneath could still come through.
Watch Episode 05 → How to thin paint, step by step →07When do I use a wash? (Before you highlight — never after)
The most repeated lesson across her episodes. On her first miniature she spent ages layering highlights, then put a wash over the whole model — and it looked "absolutely nothing like the shades I just had spent so much time putting on."
“I spent ages putting all these highlights on. And then, as a complete beginner, I put a wash over the whole thing, and just like that, my highlights disappeared. I later learned, wash first, highlight after.”
How she uses washes now:
- Wash to shade, then bring the light back. On the Poxwalkers she mixed a purple wash around the bruised, irritated areas, then brought brightness back with a lighter flesh tone and a few small highlights on the face.
- Wash the gross bits. A green wash went all around the wounds; then she highlighted every single bump on top ("about 150 weird little spots"), which she thinks made a big difference.

Full page: how to use a wash, and her three wash problems from Episode 07 →
08How do I blend colours smoothly?
Wet blending: a wet brush pulls neighbouring shades into each other instead of leaving hard, patchy edges between them. Copying Richard Gray's wet-brush approach on her Golden Demon attempt, she saw the armour stop looking like "patchwork of pieces" and start looking like armour.
“He used a wet brush technique to blend the colors and I could actually see the colors slowly fading into each other, which was really satisfying.” — Episode 03
Loose areas are good practice. The cloak was her favourite part: same palette as the armour, but she mashed colours together to see what happened. She couldn't recreate the pro's cloak texture — and it was still one of the best parts of the model.

09Should I edge highlight everything?
Not on dark, many-edged parts — at least not the way she did it. On the Poxwalkers she based the horns black, tried dark sea blue highlights that barely showed, then edge highlighted them as a quick fix.
“So, I thought I'll just edge highlight them. Bad idea. Oh boy. That's when my pox worker turned into a children toy.” — Episode 05
She repeated the same mistake on black trousers with a grey-blue edge highlight, and afterwards wondered whether she should have wet blended or glazed them instead. Her takeaway: the more edges a part has, the more a sharp edge highlight shows every slip.
Watch Episode 05 →10How do I paint metal and rust as a beginner?
Richard Gray painted his metal with NMM (non-metallic metal — metal painted with ordinary colours). She skipped it: "I did not simply because I can't," with enough new skills already on her plate. Metallic paint plus a wash did the job instead.
- Bronze: a bright bronze, a wash over it to dirty everything down, then a dry brush to put some of the brightness back (Episode 05).
- Rust: stuck on making a weapon look rusty, she asked at her local hobby store and was handed a bottle of rust effect. Adding a blue-green effect on top "brought everything together" — the weapons looked old, dirty and corroded (Episode 03).
Full page: how to paint metallics, and her rust and corrosion finish →
Watch Episode 03 →11Should I paint more than one miniature at once?
After viewers recommended batch painting, she tried three Poxwalkers together. It cut her time per model from about 20 hours to about 2.
“Three miniatures, 6 hours totals, 2 hours each mini. For a beginner, it's a win.” — Episode 05
What made it work for her:
- Keep the batch small. Three felt like the maximum she could handle.
- Timebox each section — roughly 20 minutes — or one model eats four hours.
- Same colours, same principle. The third Poxwalker was a different sculpt; she painted it the same way and kept moving.
- Check the whole model before you finish. Late in the session she realised she'd completely missed part of the trousers around the belly.

12Do I need an airbrush to start?
No. Apart from the primer, the base coats, shading, highlighting and blending on her first two miniatures were all brush work. The airbrush came in Episode 04 as a self-set challenge — one miniature, one airbrush, one hour — to see whether she could get a model tabletop-ready faster.
“Is it really nice? I don't think so, but it's not gray anymore. So, that's something.” — Episode 04
Her own verdict: not really successful, and a separate skill with a lot still to learn. It's a way to speed things up once you know the basics, not the place to learn them. More in is airbrushing miniatures hard for a beginner?

13What if a colour goes wrong?
Fix it, or accept it and keep going. Painting Thrall, her first World of Warcraft miniature, she got the skin wrong first time — "he looks like Shrek. We need to fix that." On the same model she tried a leather-ageing technique for the first time, knowing it could end up looking like "bottles of orange soda."
On the Poxwalkers she left some messy edges rather than spend another three hours fixing them: "I sucked it up and moved on." Finished beats perfect when you're learning.
“Is he perfect? No. Does he look like Thrall? I think he kind of looks like vanilla Thrall.” — Episode 06
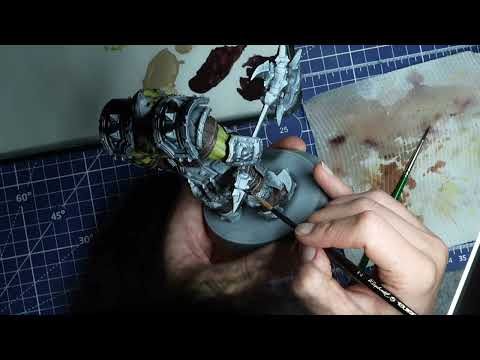
14How long does your first miniature take?
Longer than the videos make it look. Tutorials compress hours into minutes; her real numbers so far:
- Miniature 1 (Biologus Putrifier): spread over three days
- Miniatures 1 and 2: about 20 hours each by her own count — "At this rate, I will have a fully painted army in 2047."
- Poxwalkers, batch of three: about 2 hours each
“It took me three days to paint my first miniature. Okay, he is done. Is he good? I honestly have no idea. But I painted it.” — Episode 02
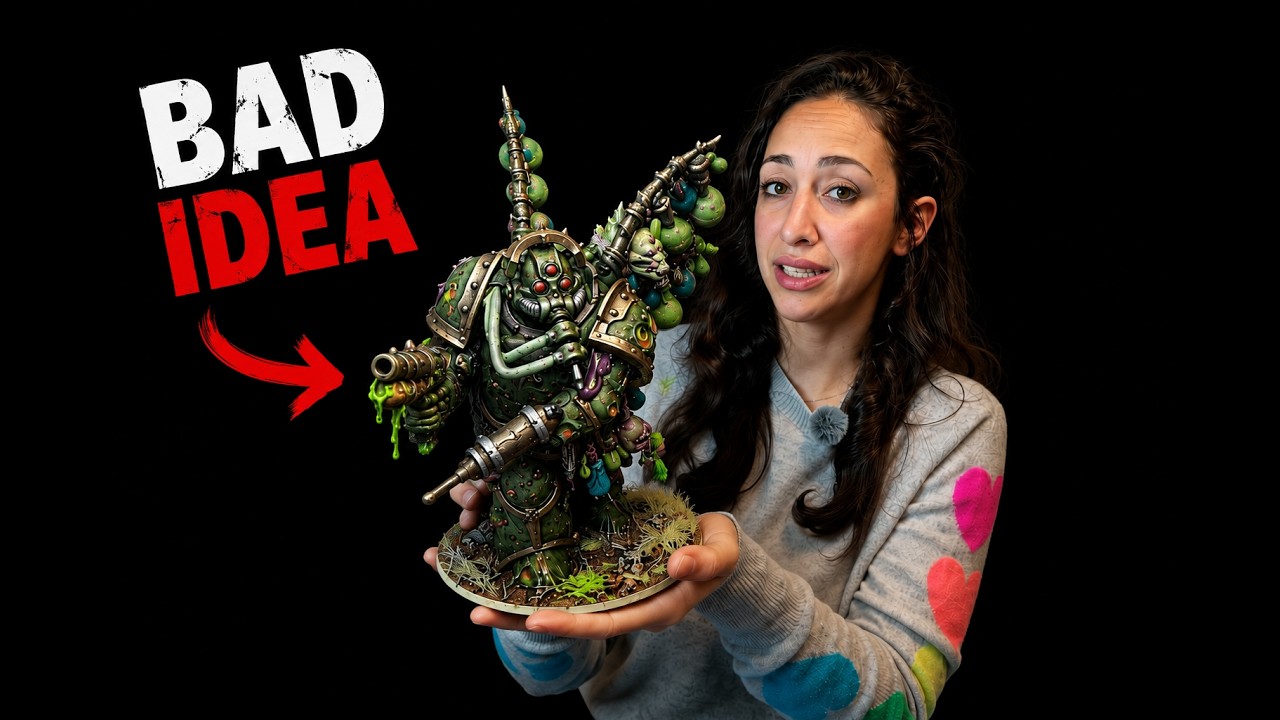
15What are the basic miniature painting techniques for beginners? (Only the ones she has actually used)
Every beginner guide lists the same dozen techniques. This list is shorter on purpose: it only includes the ones The Pigmentum has actually tried on camera, with what happened when she did. Each entry links to the episode it comes from, so you can watch the real attempt rather than a polished demo.


- Zenithal priming
Dark primer from below, light from directly above, so the shadows and highlights are roughed in before any colour. She tried it on her very first miniature and "actually found it pretty cool". Episode 02
- Layering
Painting one base colour, then building brighter and brighter shades on top in thin steps. It is how she painted miniature one, and it looked fine until the wash went over it. Episode 02
- Washes (shades)
A thin, dark paint that runs into the recesses and dirties everything down. Her rule from getting it wrong: wash first, highlight after. On the bronze she washed it "to dirty everything down" and on the Poxwalkers a purple wash marked the bruised skin and a green wash the wounds. Episode 02 · Episode 05
- Blocking in four shades
Mix four steps of one colour before you start and place them by where the light falls, darkest in the shadows and brightest where the light hits, instead of painting one flat colour and fixing the shading later. Copied from Richard Gray; patchy at first, then the armour came together. Episode 03
- Wet blending
A wet brush pulls two neighbouring shades into each other so the join fades instead of leaving a hard edge. Her first go was on the Golden Demon copy's armour, and it turned "patchwork" into armour. Episode 03
- Thin coats
Keeping the paint really thin so the layer underneath still shows through. That is how the Poxwalkers' skin went on, and it is the skill she names alongside highlights and blending as the basics she was still learning. Episode 05
- Edge highlighting
A lighter line along the sharp edges of a part. It went badly on black horns and black trousers, where every slip showed, and she thinks she should have wet blended or glazed those instead. Episode 05
- Dry brushing
An almost-dry brush dragged across the raised detail so only the high points catch paint. She used it to bring the brightness back on washed bronze. Full drybrushing page. Episode 05
- Metallic paint plus a wash
Real metallic paint, then a wash to age it, instead of painting the metal with ordinary colours (NMM). Her honest reason for choosing it: "I did not [do NMM] simply because I can't." Episode 03
- Rust and corrosion effects
A bottle of rust effect from her local hobby store, then a blue-green effect over it, made the weapons look "old and dirty and corroded". Episode 03
- Batch painting
The same step on three miniatures before moving to the next step. About 6 hours for three Poxwalkers, roughly 2 hours each, down from about 20. Episode 05
- Airbrushing
Spraying thinned paint for fast base coats and soft shading. Her one-hour challenge got a miniature "not grey anymore" but not what she'd call finished; she rates it a separate skill with a lot still to learn. Episode 04
- Ageing leather
A technique she tried for the first time on Thrall's straps, knowing it could end up looking like "bottles of orange soda". Episode 06
Not tried yet, by her own admission: non-metallic metal (NMM), freehand painting (the skull on the Golden Demon copy: "it's not happening"), and glazing, which she has only wondered about after the edge-highlight mishap. Slap chop and contrast-style speed painting were recommended by viewers but she chose a small batch instead. When she films one, it gets added here.
16How do I paint my first Warhammer army?
Honest answer first: she hasn't finished one yet. This is the part of the hobby she is still working out on camera, so this section keeps her real numbers apart from the general advice.
The army came before the painting. In Episode 01 she walked into a Warhammer store, bought what the staff recommended, and decided to build a force she would actually play:
“If I'm going to spend hours and hours painting minis, then I might as well build an army that I like to play with.” — Episode 01
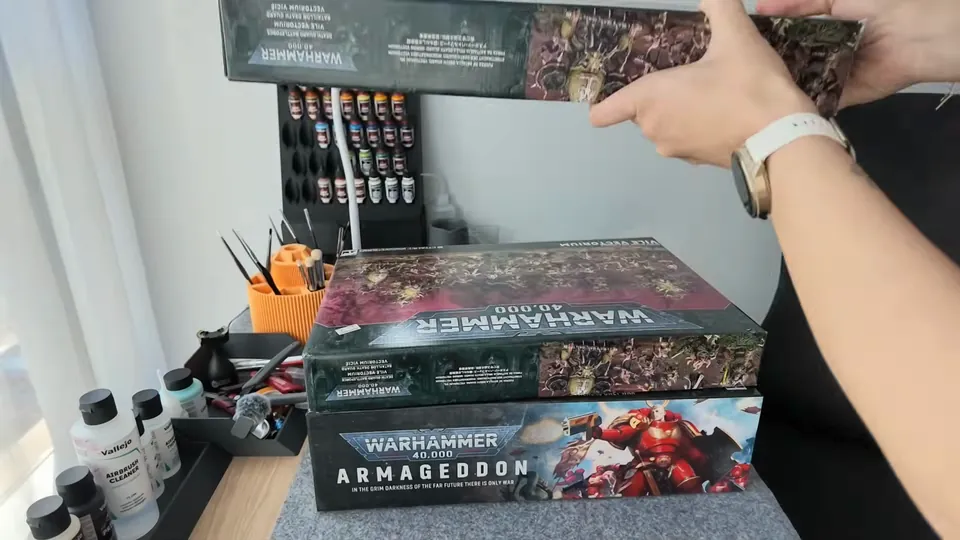
The problem showed up by Episode 04:
“My last two minis took me about 20 hours each to paint. At this rate, I will have a fully painted army in 2047.” — Episode 04
Her one-hour airbrush challenge did not solve it (“I wasn't really successful”), so she asked army painters in the comments how they paint a whole army without spending 20 hours on one miniature. They said batch painting. In Episode 05 she painted three Poxwalkers together in about 6 hours, roughly 2 hours each, and still drew a line: “Would I batch paint 30 of them at once? Absolutely no.”
What her episodes so far point to
- Pick an army you like looking at. It was her own reason for buying in, and you will be staring at the same models for a long time.
- Paint in small batches. Three at a time cut her time per model from about 20 hours to about 2. How her batch of three worked.
- Not every model needs the full treatment. She saved everything she had learned for one big Death Guard model in Episode 07; the rank and file is where the time savings matter.
General army-painting practice (not from her episodes yet)
- Aim for “tabletop standard”: a primer, a few base colours, a wash and a painted base rim reads well at arm's length on the table.
- One recipe for the whole unit. Write the paints and order down after the first model so the rest match.
- Let the quick steps do the work: a coloured spray or airbrush base coat, a wash over everything, then a drybrush on raised detail. Contrast-style one-coat paints are another common shortcut.
- Finish one unit before starting the next, and base the whole army the same way so it looks like one force.
Want her real timings per model? They are on the how long does it take page. When she films her first full unit, it goes here.
17Is painting Warhammer miniatures hard for a beginner?
Harder than the tutorials make it look, but not in the way most beginners fear. The brushwork is learnable. What caught her out was the time, the number of steps, and how one wrong step can undo hours of work. Her first miniature took three days. Six weeks later, in Episode 07, she finished her biggest Death Guard model and still called herself a beginner. That is the honest shape of it: not hard to start, hard to finish well.
Her own read on it, in the order it happened. Before a drop of paint, in Episode 01:
“I may have underestimated this hobby. This is not getting painted today. Because if I paint him now, I will absolutely ruin him.” — Episode 01
Her first model was a Biologus Putrifier (“I could have started with something simple, but instead I chose this”). What came out of the box “definitely did not look like a miniature”, the zenithal she “actually found pretty cool”, and then the wash went over the shading she had spent hours on and “it looked absolutely nothing like the shades I just had spent so much time putting on”:
“It took me three days to paint my first miniature. Okay, he is done. Is he good? I honestly have no idea. But I painted it.” — Episode 02
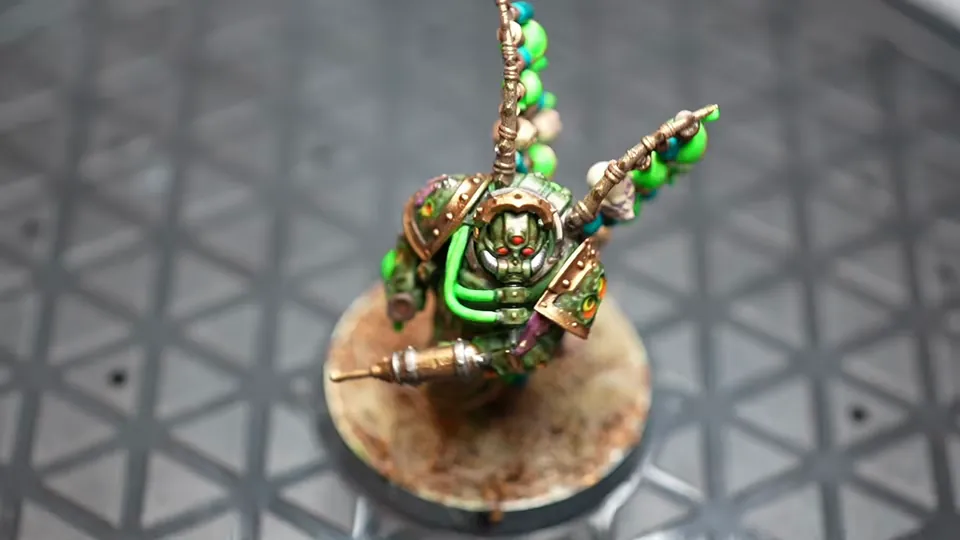
By Episode 07 the question had changed from “can I do this at all” to volume. Edge highlighting was “something 6 weeks ago me barely knew it existed”:
“One edge wasn't too bad. 10 edges wasn't too bad. There are approximately 500 edges on this thing.” — Episode 07
And her verdict at the end of that episode:
“I'm still a beginner, and I have absolutely no idea what I'm doing half the time. But I made this. So apparently, creativity can be learned.” — Episode 07
What actually made it hard for her
- Time, not talent. Three days for the first model, then “about 20 hours each” for the next two (Episode 04). Every timing is on the how long does it take page.
- Step order. The wash after her highlights in Episode 02 flattened the shading. Wash first, highlight after.
- A very detailed first model. She picked one with tubes, skulls and vials and says so herself. She cannot tell you which Warhammer models are the easiest to paint, because she never painted an easy one.
- Repetition on a big model. 500 edges is the same edge highlight 500 times. Her highlighting notes cover how that went.
What made it easier (from her episodes)
- Copying a tutorial, then asking. “A huge amount of what I've learned is from you guys in the comments.” The Copy the Pros episodes are her doing exactly that, with the artist credited.
- Learning the order once. Prime, base coat, wash, then highlights. The order she settled on.
- Small batches once the basics are in. Three Poxwalkers at a time took her from about 20 hours a model to about 2. How the batch worked.
- Leaving the mistakes in. Every one of them is on camera, which is why this guide can point at the exact moment each lesson arrived.
If you are deciding whether to start: she had never painted anything before Episode 01 and did not think of herself as a creative person. Start where she started and judge for yourself.
Where this started
Before any of the above, there was no plan at all — just a first trip to a Warhammer store that turned into a lot more than one miniature.
“I am going to document everything. Every lesson, every mistake, every tiny little improvement... If you're a beginner, or you just want to see what happens to all the minis, come along for the journey.” — Episode 01
Watch Episode 01, where it all started →
FAQ
- Do you wash a miniature before or after highlighting it?
- Wash first, highlight after. Applying a wash after your highlights pulls them back down — she learned this the hard way on her first miniature. Full detail on the highlighting page.
- What is zenithal priming?
- Priming dark from below and light from above, so the model already shows rough shadows and highlights before any paint goes on. A common beginner-friendly shortcut — see the priming page.
- Do I need an airbrush to start painting miniatures?
- No. The basics — priming, base coats, shading, highlighting, wet blending — are all brush work. Her airbrush episode was a one-hour speed-painting challenge on a later miniature, not how she learned to paint.
- How long does painting your first miniature actually take?
- Longer than the tutorials suggest. Her first took three days; her first two took around 20 hours each by her own count. Her full timings, from three days to about 2 hours each, are on this page.
- What's the actual order of steps for a beginner?
- Prime, base coat dark-to-light, wash to set the shading, then final highlights and edge work on top of the wash.
- Is batch painting worth it for a beginner?
- For her, yes: three Poxwalkers in about 6 hours, roughly 2 hours each, against about 20 hours per model before. She kept it to three, used the same colours on all of them, and timeboxed each section to about 20 minutes.
- What is the difference between a wash and dry brushing?
- A wash is thin, dark paint that runs into the recesses and dirties the whole area down; dry brushing drags an almost-dry brush over the raised detail so only the high points catch paint. On her Poxwalkers' bronze she did both in that order: wash to dirty it down, then dry brush to bring some brightness back.
- Where can I watch someone actually learn this from zero?
- The Pigmentum's YouTube channel (@ThePigmentum) — every episode is real, unedited footage from her first grey sprue onward, mistakes included.
- What are the best miniature painting techniques for beginners?
- Start with thin coats, layering, a wash before you highlight, and wet blending. Edge highlighting and dry brushing come after, and airbrushing and non-metallic metal can wait. All of these are shown, with what went wrong, in the technique list above.
- How do I paint my first Warhammer army as a beginner?
- Small batches and one simple recipe per unit. She has not finished an army yet: her first two models took about 20 hours each, and three Poxwalkers together took about 2 hours each. Her army notes and the general tabletop-standard method are above.
- Is painting Warhammer miniatures hard for a beginner?
- Harder than it looks on video, but learnable. Her first miniature took three days and she had no idea whether it was good; six weeks later she finished her biggest Death Guard model and still called herself a beginner. The hard parts were time, step order (wash before highlights) and a very detailed first model, not the brushwork. Her full answer, in her own words, is above.
